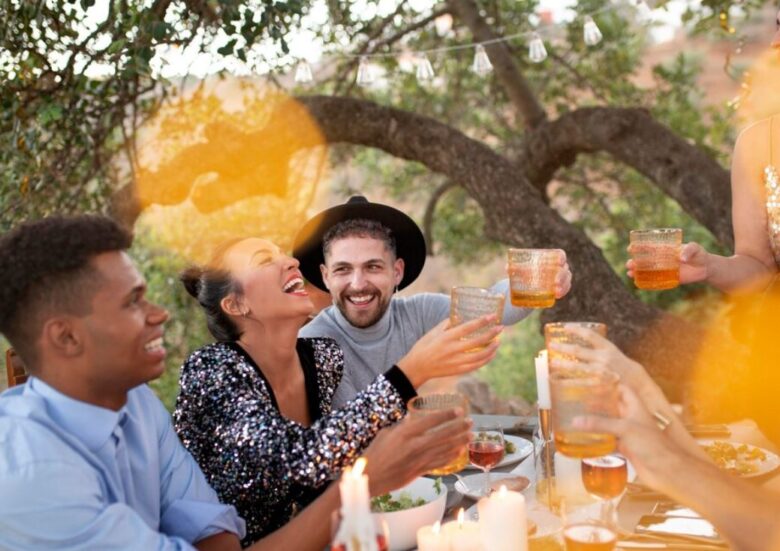
A well-styled bar area does more than serve drinks. It becomes a visual anchor, a social hub, and a photo magnet. Guests naturally gather around the bar, and when it is styled with intention, it turns into one of the most photographed areas of any event. From weddings and birthdays to corporate events and private parties, a photo-worthy bar area elevates the entire experience.
In this guide, we present a clear, practical, and detailed approach to styling a bar area that effortlessly becomes a stunning photo spot. Every section focuses on execution, clarity, and visual impact.
Choosing the Perfect Location for the Bar Area
Placement determines visibility and flow. A bar area should be easy to access while standing out visually.
- Position the bar where guests naturally pass through, such as near entrances, dance floors, or central gathering points.
- Avoid cramped corners that restrict movement or block photo angles.
- Allow enough space in front of the bar for guests to stand, interact, and take photos comfortably.
A well-placed bar invites attention without disrupting guest movement.
Selecting a Bar Structure That Photographs Well
The physical bar structure sets the foundation. Clean lines and strong shapes photograph better than cluttered or uneven designs.
Popular bar structure options include:
- Wooden bars for rustic, classic, or outdoor events
- Acrylic or mirrored bars for modern and luxury settings
- White paneled bars for weddings and minimalist themes
- Metal frame bars for industrial or urban events
Ensure the bar surface is clean, polished, and free from visual noise.
Defining a Clear Color Palette for the Bar
Color harmony is essential for visual appeal. A bar area should follow the event’s color palette while still standing out.
Effective color strategies include:
- Neutral base colors with bold accent tones
- Monochrome palettes with metallic highlights
- Earth tones paired with greenery
- Dark colors balanced with warm lighting
Limit the palette to three or four colors to maintain visual balance in photos.
Creating a Strong Backdrop Behind the Bar
The backdrop is the most important element for turning a bar into a photo spot. Guests will stand in front of it, making it the background of countless photos.
Backdrop ideas that work well:
- Floral walls using fresh or artificial flowers
- Greenery walls with layered leaves and textures
- Draped fabric with soft folds and depth
- Wooden panels with custom signage
- Balloon installations arranged in organic patterns
The backdrop should extend wider and taller than the bar to frame guests naturally.
Using Lighting to Highlight the Bar Area
Lighting transforms an ordinary bar into a visual statement. Proper lighting enhances colors, defines shapes, and improves photo quality.
Effective lighting options include:
- Warm LED strip lights under the bar counter
- Uplighting behind the backdrop
- Hanging pendant lights or chandeliers above the bar
- Fairy lights woven into greenery or fabric
- Neon signs for modern or playful events
Lighting should be soft enough to flatter faces while bright enough for clear photos.
Adding Statement Signage That Draws Attention
Signage gives the bar personality and purpose. It also becomes a focal point in photos.
Popular signage ideas include:
- Custom neon signs with phrases or names
- Acrylic signs with clean typography
- Wooden signs with engraved lettering
- Chalkboard signs for casual or themed events
Position signage at eye level so it appears naturally in photos.
Styling the Bar Front for Visual Impact
The front of the bar is often overlooked, yet it is fully visible in photos. Styling this area adds depth and polish.
Bar front styling ideas:
- Floral garlands draped across the front
- Fabric skirting in event colors
- Greenery panels attached to the bar face
- Patterned decals or custom wraps
Keep the design symmetrical for a balanced photographic look.
Designing a Bar Top That Looks Clean and Elegant
The bar top must remain functional while staying visually appealing.
Best practices include:
- Limit visible items to essentials only
- Use matching glassware for consistency
- Arrange bottles neatly in small clusters
- Add a single floral arrangement or candle group
Avoid clutter, as it distracts from photos and reduces elegance.
Using Glassware as a Styling Element
Glassware adds texture, shine, and sophistication. Matching or coordinated glassware elevates the bar instantly.
Glassware styling tips:
- Use clear glass for a timeless look
- Add colored rims or tinted glasses for themed events
- Display glasses upside down on trays for symmetry
- Incorporate specialty glasses for signature drinks
Clean glassware reflects light beautifully in photos.
Creating a Signature Drink Display
Signature drinks add personality and visual interest. A small display explaining the drinks invites guests to engage.
Effective display elements include:
- Printed drink menus in frames
- Acrylic drink signs placed on the bar
- Garnish trays with fresh fruits and herbs
- Color-coordinated drinks to match the theme
This setup encourages guests to take photos before ordering.
Incorporating Florals and Greenery Around the Bar
Florals soften the bar area and add life. Greenery introduces texture and color without overwhelming the space.
Placement ideas:
- Floral arrangements at both ends of the bar
- Greenery garlands along shelves
- Hanging floral installations above the bar
- Small potted plants placed strategically
Choose flowers and greenery that match the event palette and season.
Styling the Area Around the Bar for Photos
The surrounding space matters just as much as the bar itself.
Enhancements include:
- High cocktail tables styled with linens and candles
- Decorative stools or chairs
- Floor decals or rugs defining the bar zone
- Rope stanchions for structured elegance
These elements frame the bar area and guide guests into photo-friendly positions.
Balancing Height for Visual Interest
A good photo spot includes varied heights to create depth.
Ways to introduce height:
- Tall floral arrangements behind the bar
- Hanging lights or installations above
- Tiered shelves for bottles or décor
- Vertical signage or panels
Height variation prevents the bar from looking flat in photos.
Using Shelving to Add Style and Function
Back bar shelving allows for organized display and visual interest.
Shelf styling tips:
- Arrange bottles symmetrically
- Mix bottles with décor items like candles or plants
- Leave negative space to avoid clutter
- Use warm backlighting for shelves
Shelving adds dimension and a professional finish.
Ensuring Clean Lines and Visual Order
Visual order creates elegance. Disorganized bars rarely photograph well.
Key rules:
- Keep symmetry where possible
- Align décor elements evenly
- Hide cables, cords, and storage items
- Maintain consistency in materials and finishes
Clean lines translate into clean photos.
Designing for Different Event Types
Wedding Bar Styling
- Soft florals and romantic lighting
- Elegant signage and neutral tones
- Glassware with gold or silver accents
Corporate Event Bar Styling
- Sleek lines and minimal décor
- Brand colors incorporated subtly
- Professional lighting and signage
Birthday and Celebration Bar Styling
- Bold colors and playful signage
- Balloons or themed décor
- Neon signs or custom graphics
Each event type benefits from intentional styling aligned with its purpose.
Considering Guest Interaction and Flow
A photo-worthy bar should not block service or guest movement.
Ensure:
- Clear paths to order drinks
- Space for guests to step aside for photos
- No sharp décor edges in busy areas
A smooth flow keeps the bar attractive and functional.
Maintaining the Bar Area Throughout the Event
Consistency matters from start to finish.
Maintenance tips:
- Wipe surfaces regularly
- Replace fallen décor immediately
- Refill garnishes neatly
- Adjust lighting as the event transitions from day to night
A maintained bar remains photo-ready at all times.
Styling for Day and Night Transitions
Events often shift from daylight to evening. The bar should adapt visually.
Daytime focus:
- Natural colors and lighter tones
- Minimal artificial lighting
Evening focus:
- Enhanced lighting and glowing accents
- Candles and illuminated signage
Plan both phases during setup.
Encouraging Guests to Take Photos Naturally
A successful photo spot feels inviting, not forced.
Encouragement methods:
- Place subtle signage inviting photos
- Ensure good lighting at face level
- Keep the area open and accessible
When guests feel comfortable, photos happen naturally.
Final Touches That Make a Difference
Small details elevate the bar area from good to unforgettable.
Consider adding:
- Personalized cocktail napkins
- Coordinated straws or stirrers
- Scented candles for atmosphere
- Soft background music nearby
These details enhance the overall sensory experience.
Conclusion
A bar area designed with intention becomes more than a service point. It becomes a centerpiece, a meeting place, and a photo destination. With careful attention to placement, color, lighting, structure, and detail, a bar can transform an event’s visual story. When guests are drawn to the bar for both drinks and photos, the design has succeeded.
Caroline Mureithi founded Swanky Events in 2016 with a passion for creating unforgettable experiences through exquisite event planning and decoration. Based in Portland, Oregon, Swanky Events specializes in weddings, corporate events, fundraisers, and social gatherings. Caroline and her team are dedicated to turning visions into reality, ensuring every detail exceeds expectations. Visit our Facebook Page.